Sunday, August 28, 2016

Quilt Finish

       Where does the time go?  Almost exactly a year ago, actually a little more than that, I published a post about the set up of my new John Flynn Quilt Frame, using this quilt as a sample.  Find the post HERE.  I FINALLY finished the quilt, binding and all.  I have to admit, I didn't complete the quilting on the frame.  I found it to be too cumbersome and limiting.  I was a little disappointed because it was a spendy item.  I probably won't use it again.  The frame is good, and may work well for some, but it's hard to teach an old dog new tricks.  Quilting is not my favorite thing to do anyway.  I am a 'get er done" quilter.  Stippling and straight row (walking foot) quilting are my friends.  Maybe I expected the John Flynn Frame to make me a better quilter.  I don't think it works that way anymore than buying more organizing supplies makes your space more organized.  Sigh....


SaveSave

Saturday, August 20, 2016

Winter Nights Fusible Appliqué Quilt

A friend gave me this pattern for Christmas last year and on a rainy, windy day this summer, I decided to start putting it together.  
 I LOVE fusible appliqué!  It's kind of like coloring in a coloring book in that it's calming and you get to choose the colors for the redi-made design.  You can find a tutorial for fusible appliqué  HERE.  
In addition, to the calming affects, fusible appliqué provides that feeling of instant gratification.

 The shiny, shimmery Fairy Frost adds the feeling of cold snow to the block.
This quilt pattern includes some pieced blocks and block borders to add a little variety to the project.  

The pieces for the quilt are large, which I also love because I like to topstitch around each piece to secure them.  The larger pieces are easier to stitch around.

These blocks are great time fillers.  I have a box with all of my blocks that have fusible pieces next to my sewing machine and if I have a few minutes between activities, I sew around a few pieces.    I'll put thread in the machine that matches the color of pieces in the blocks, and will sew around all of the pieces in all of the blocks that have that same color of thread in them. For example, I put silver metallic thread in my machine and sewed all of the silver metallic pieces in all of the blocks.  It took a few days as I just do it as a time filler.  I usually have several projects using fusible web, so all of those blocks are in the box as well. 

I think I will use these fabrics for my border.  
Linking to:  MCM, Handmade Mondays, Monday Making, Craftastic Monday, Moving it Forward Monday, Linky Tuesday, Too Cute Tuesday, Sew Cute Tuesday, Show and Tell, Midweek Makers, Wake Up Wednesday, Sew Fresh Quilts, NTT , Handmade Hangout, Can I Get A Whoop Whoop, Fabric Frenzy Friday,

Sunday, August 14, 2016

Run 'n Stitch WIP


I wanted to do something with this cute little fat quarter bundle.  It is from the Pixie Noel collection by Riley Blake.  I was reading my favorite blogs and found the perfect pattern to use with this little bundle.  You can find the pattern HERE.

 I pulled out my Accuquilt GO, which I haven't used for a very long time.  Because I haven't used it, I really didn't get the best results.  I put too much fabric in at first and the cuts were off, so I did have to do a lot of compensating when I sewed the blocks together.  Luckily the pieces were squares so they still went together pretty well even though they were not all accurate.


I didn't use the poinsettias from the bundle in the quilt so I used it for the border.  This is the border audition.  I think I like the red inner boarder so I will go with that.  This will be the perfect Christmas quilt for a little one.  It is so simple because the blocks are big.


For this cute little quilt I used:
-fat quarters for the two print fabrics in the quilt, and the blue and red in the quilt.  
-I needed a fat quarter and two extra 3.5 inch squares of the stripe. I am going to bind the quilt with the stripe and took the two 3.5" squares from that yardage.  It will take a total of 1/3 yards of the stripe fabric.
-one quarter yard of the inner border fabric.  Cut 4 strips, 1.5" X WOF.
-One half yard for the outer border.  Cut (4) 4 inch by WOF pieces.  


Saturday, August 13, 2016

Lori Holt Quilt Along

It's time to start thinking about your Christmas projects.  Lori Holt is starting a quilt-along on August 15th right on her blog.  You will get to make this quilt with her Cozy Christmas fabrics.  Check out her blog and find the details at-Bee In My Bonnet
This Cozy Christmas fat quarter bundle by Lori Holt for Riley Blake has all of the fabrics used in this quilt.  I have my fabrics and I'm ready...let the fun begin!


Find this adorable fabric bundle and yardage HERE.

Linking To:  Oh Scrap,

Sunday, August 7, 2016

Church Lady Apron


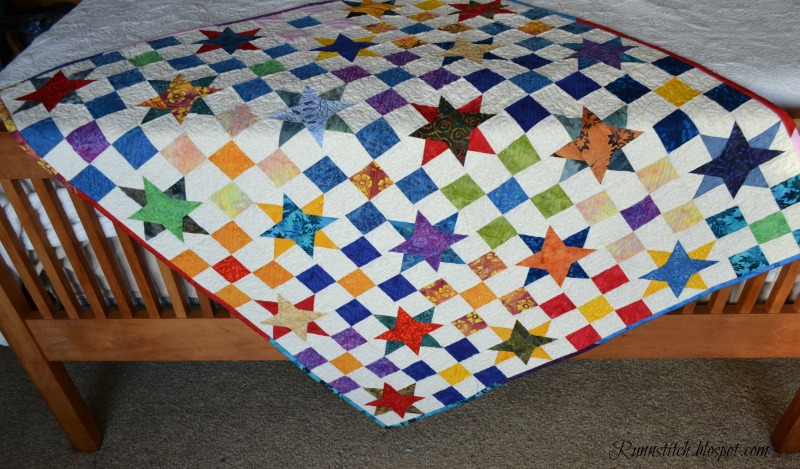
Aprons have been around for a very long time.  When people started wearing clothes, they started wearing aprons.  Aprons protect everyday clothing from the slop and mess of life.  While aprons have been used in different industries and for different purposes throughout history, the apron has been and is a major player in the production and consumption of food.   Everyone in the food industry wears an apron, from the people in the processing plant to the servers at the restaurant.  Aprons aren't only for protection however, throughout history, aprons were also worn as outfit embellishments.  Nearly every traditional women's costume includes an apron.  Today, aprons are still worn for protection, but we also like them to be a little stylish; to make a statement; to add interest to our daily work.  

One of my favorite aprons is the Church Lady Apron, created by Mary Mulari.  Find the pattern HERE.  There are 2  reasons I love this apron.  First,  It is simple, but stunning and second, it versatile.  It is reversible so you have two aprons in one.  You can cook with one side and serve with the other (not messy) side.

I used fabrics from the Dreamin' Vintage collection by Jeni Baker for Art Gallery Fabrics.  I LOVE Jeni Baker's fabrics.


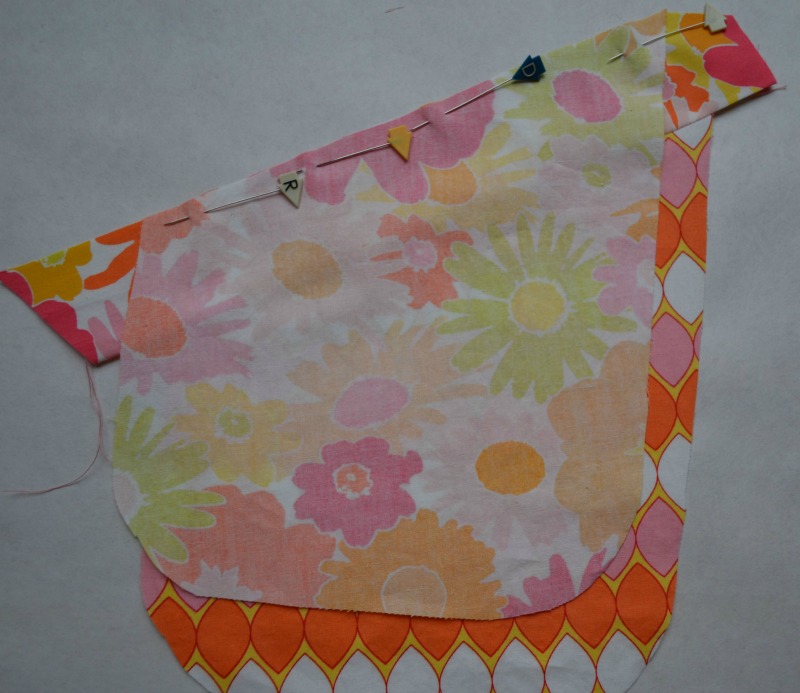
I am all about simplicity, so I have added a couple of design changes to this apron pattern that I want to share with you.  I only put one pocket on each side of the apron so I don't have the headache of trying to make the two pockets on one side even and not lopsided.  I use the pocket pattern that is included, but my pocket pattern has has a little trim at the top.  To make this pocket, you first, cut your pocket pattern out and then cut a strip of fabric that is longer than the pocket and 2-3 inches wide.

Sew the trim to the top of the pocket

 Lay the pocket lining on top of the pocket fabric so all of the sides and bottom match.

Pin the other side of the pocket trim to the pocket lining.

 It will look like this when pinned.
Match your pocket with the lining and finger press the top of the trim.  Pin and sew.  Turn the pocket right side out and press.  Top stitch the top of the pocket.  The rest of the pocket will be top stitched when you put it on the apron.


The next design change is in the neck strap. Sew your apron neck straps to the apron body.  Then, when you are sewing the apron together, leave the neck straps open.  This is in addition to the opening you will have to turn the apron right-side out after you've sewn the apron together.
 
Next, sew the neck strap together on one side and leave it open on the other side.
Third, press your seams so they match, top and bottom.  Press one side of the top neck piece under and lay it down on top the  then lay the unsewn piece on top of the sewn piece.
When you top-stitch your apron, start with the neck seam.  Top stitch the open seam down and then continue around the body of the apron with your top stitch.


Find the pattern and fabrics for this apron in my Run 'n Stitch Shop HERE


Linking to:  Around Tuit, Inspire Me Monday, Monday Making, Em's Scrapbag, Craftsy Monday, Merry Monday Link Party Project Inspired Linky Party, Show and Tell, Too Cute, Midweek Makers, Handmade Hangout, Needle and Thread Thursday, Can I Get A Whoop Whoop, Fabric Frenzy Friday, Saturday Sparks, Show Off Saturday,  A Bouquet of Talent, That DIY Party 

Monday, August 1, 2016

11 Step Pillowcase Pattern

On November 1, 2013 I posted a pillow case pattern.  This year, I am posting another pattern that is almost exactly like that one, but steps 8-10 in this pattern will change the look of the case.  
  

Step 1
Choose your fabric-
You will need:
1/4 yard cuff fabric
3/4 yard pillow case fabric
1 to 2.5 inch strip of accent fabric

Step  2
Iron the accent strip of fabric in half with wrong sides together.  Lay the cuff fabric on a table right side up.  Lay the ironed accent strip strip on top of the right side of the cuff fabric, matching raw edges.  Lay the pillow case fabric on top of the accent fabric, and the cuff fabric, wrong side up, matching raw edges and pin.
Step 3:
Roll the pillow case fabric up so you can wrap the cuff fabric around it.


Step 4
Re-pin the raw edges of the roll together.  Be sure to use a lot of pins.

Step 5
Using a 1/4 inch seam, sew all 4 layers of fabric together.

Step 6
Pull the pillow case fabric out of the end of the roll.


Step 7
You will need to square-up your pillow case.  Fold you pillowcase in half with wrong sides together.  Lay your pillow case on a cutting board and arrange so the cuff edges match.  


Lay your ruler on the top of the pillow case with one line on the cuff edge.  


Using your rotary cutter, trim the excess fabric from the side and bottom of the pillow case.


Step 8
This is where this pillow case pattern is different that the last pattern I posted in November, 2013.  You will sew the pillow case  wrong sides together.  Be sure to place a pin on either side of the trim to keep the trim edges together.


Pin all around the raw edges on the side and bottom of the pillow case.


 Step 9
Sew your raw edges using a 1/8 inch seam.


Turn the pillow case and press the seam.

Step 10
Turn the pillow case inside out so that the rights sides of the case are together.  Place pins on each side of your trim again.  This helps the trim match at the seam line.  Sew a 1/4 inch seam around your seamed edge.  


 Step 11
Turn you pillow case right side out and press.


Linking to:  A Round Tuit  321, Monday Funday, Project Inspired Link Party week 181, Boms Away Inspire Me Monday Show and Tell Linky Tutorial Tuesday, Linky Tuesday, Midweek Makers, Needle and Thread Thursday, Handmade Hangout, Create It Thursday, Whomp There It Is, TGIF, Saturday Sparks, Bouquet of Talent Linky Party Bewitching Projects Block Party Sew Cute